Candle Making at Home: Tips from the experts

How many wicks does my candle need?
CLICK HERE to check out the full article
Do you want to make a candle, but don’t know how many wicks to use? You’re not alone and even professional candle makers have challenges when choosing the perfect wick setup. In this guide, I will explain how I would suggest wicking a candle for an absolute beginner.
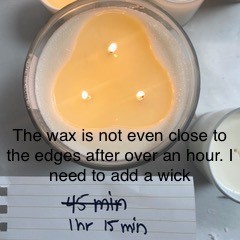
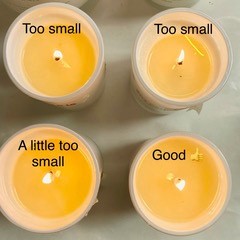
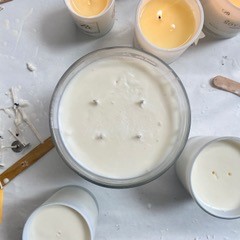
It would be ideal to start with a jar 3” or less and 1 wick. This will show how one wick performs on its own. Once you’ve poured your one wick candle let it harden overnight. Now you’ll perform a test burn. When the wick is lit, the wax should ideally pool to the edges within an hour or so.
There are 3 possible outcomes of this test burn:
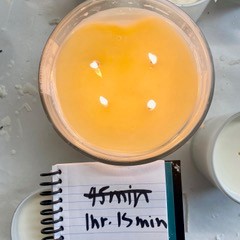
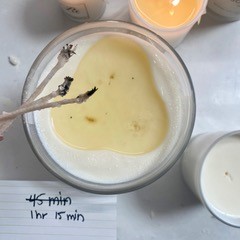
-It’s perfect! It burns (pools) the wax to the edges in 45 min. to an hour or so. Awesome, well done!
-It pooled to the edges in less than 45 min. The wick may be too large for this jar. The jar may get too hot, crack, and/or make the jar black. Solution: size down your wick and repeat your test burn with a smaller wick.
-It didn’t pool to the edges after an hour. The wick may be too small for the jar. A wick too small will cause your candle to leave wax on the edges and tunnel down or even put itself out. Solution: size up your wick and repeat your test burn.
Now larger candles won’t be so daunting. Now that you know how big a pool of wax one wick makes, all you have to do is see how many of those pools would be required for a larger jar. For example, if your 1 wick candle was 3” in circumference and the larger jar you want to wick is 9”, start with 3 wicks then do a test burn. The same possible outcomes above will determine where you go from here.
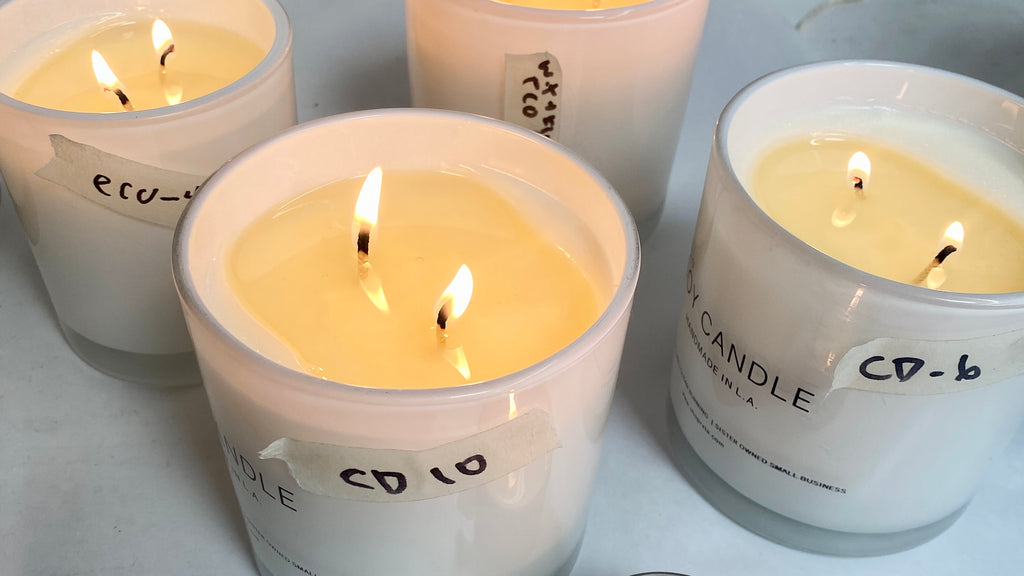
Here I used 3 wicks (the same wick size as my 1 wick candle) for our new XXL 50 oz jar. As you can see it is not burning to the edges within an hour or so. At this point, I stopped the test and used my “hack” to insert new wicks.
I re-wicked my XXL candle jar using the same wick but I added a fourth one. I’m happy with the result.
My general rule is to use 1 large wick for jars smaller than 3” in diameter, 2 medium-sized wicks for a jar 3-4” in diameter, and 3-4 medium or large wicks for jars larger than 4”. To be clear, this is very general and the number of wicks used depends on how large a pool each wick makes. The more wicks you use, the more potential there is for them to not burn evenly. We prefer to stick with 4 wicks or less.
BONUS! THE TEST BURN HACK
Test burns are important, but kinda a pain. My “Hack” makes it easy to test a jar without having to burn the candle all the way down.

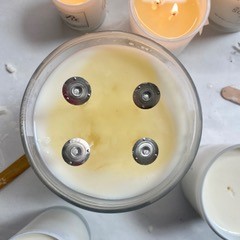
We usually would glue our wicks down, but with this hack, you will wick upside down. This will allow you to pull out and replace the wicks of your test burn candle.
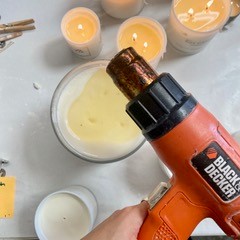


After an unsuccessful test burn, I pulled out the old wicks. I used a heat gun to even out the top layer of wax. I could have also filled it with more wax. Then I poked holes where I wanted my new wicks and placed the wicks in the wrong way. The candle was good to re-test in about an hour.
Don’t worry if your candle isn’t perfect on the 1st try. You’ll get better the more you play.
*Please note that this is only for test candles. The wick will not be stabilized at the bottom and should not be left unattended.*
-Jocelyn Levine at Rx Candles
Continue reading


Comments
Be the first to comment.